Carrot, Beet, and Greens Juice

When I first purchased the juicer, I had many conversations with my friend J about what kinds of juices to try (she’s been juicing for a while now). I was getting a bit bored of making the same juice every day, so she suggested a beet and carrot juice.

I immediately declined to try it. I don’t like carrot juice.

I am so glad that J encouraged me to give it another try with a few other yummy ingredients! I could barely taste the carrot juice and still got all the fantastic benefits of drinking carrot juice! The apple give it some nice sweetness. And I loved the suggestion to finish it off with some fresh ginger!

YUM! I think this is my new favourite juice!

Carrot, Beet, and Greens Juice

Ingredients

  • 2 carrots – approximate cost $0.30
  • 2 beets – approximate cost $0.30
  • 2 handfuls spinach – approximate cost $0.50
  • 1 handful (about 5 leaves) romaine lettuce – approximate cost $0.40
  • 1 Macintosh apple – approximate cost $0.30
  • 1 knob ginger – approximate cost $0.05

Method

  1. Add the ingredients to the juicer one at a time, starting with the softest ingredients and moving to the most dense:
    1. Spinach
    2. Romaine lettuce
    3. Macintosh apple
    4. Carrots
    5. Beets
    6. Ginger
  2. Serve and enjoy!

Makes 1 serving (approximate cost: $1.85 per serving).

Wednesday Link Parties

Cast Party Wednesday

White Lights on Wednesdays

Fluster Buster

Venison Meatloaf Topped with Horseradish Mashed Potatoes

When I came across some ground venison at the local butcher shop, I knew I had to buy some and re-live my childhood just a bit. When I was a child, my dad would go hunting each year.

During Dad’s week away, my mom would spoil my brother and I. We got to watch more TV than usual and stay up late. I liked to stay up late and spend time with the family dog, Rocky (I needed an excuse to share this adorable picture I came across while cleaning this week!). We weren’t allowed to go out for walks after dark, so I would work on teaching him tricks, chasing each other around the living room, and snuggling (even when he got bigger, he still liked to snuggle. There were a few years where I’m pretty sure the dog was bigger than me).

9-year-old me and Rocky (somewhere around 15-weeks old at the time), both looking a bit sleepy.

Most years, Dad would come home with some tasty venison. I always tried my best not to imagine that what I was eating what was once a cute deer. I still try not to think about it too much. The only things I recall my parents cooking with the venison were jerky (we had our own dehydrator) and chili. More recently, we make meatloaf.

Because it’s been a cold, rainy week around here, I decided that some comfort food was in order. And venison meatloaf hit the spot! But I did go a bit overboard. I made a double-batch of meatloaf. After 5 days of eating meatloaf, I took a few leftover pieces to some friends. The remaining slices have been put in the freezer for the coming weeks.

While I’ve since come up with my own recipe for venison meatloaf — no matter how it is spiced — it reminds me of my childhood.

Venison Meatloaf Topped with Horseradish Mashed Potatoes

Venison Meatloaf

Ingredients

  • 2 pounds ground venison – approximate cost $20.00
  • 1 cup breadcrumbs – approximate cost $1.00
  • 2 teaspoons sea salt – approximate cost $0.05
  • 1 teaspoon cane sugar – approximate cost $0.10
  • 1 teaspoon black pepper – approximate cost $0.10
  • 3 teaspoons paprika – approximate cost $0.25
  • 1/2 teaspoon allspice – approximate cost $0.10
  • 1/4 teaspoon nutmeg – approximate cost $0.10
  • 3 cloves garlic, minced – approximate cost $0.30
  • 1 can diced tomatoes, drained – approximate cost $1.25
  • 4 large eggs – approximate cost $1.20

Method

  1. Preheat oven to 375 degrees Fahrenheit.
  2. Combine the breadcrumbs, sea salt, cane sugar, black pepper, paprika, allspice, nutmeg, and garlic in a large mixing bowl.
  3. Add the ground venison, tomatoes, and eggs.
  4. Mix until well combined.
  5. Divide mixture into two.
  6. Form into two loaf shapes.
  7. Place into a loaf pan.
  8. Bake for 45 minutes (this is a great time to start preparing the horseradish mashed potatoes).
  9. Remove from oven.
  10. Top the meatloaves with the horseradish mashed potatoes.
  11. Return to oven and bake for an additional 15-20 minutes (or until cooked through).
  12. Broil for a few minutes so the potatoes are crispy and golden (Watch it closely though, they can burn quickly if you aren’t paying attention).
  13. Remove from oven.
  14. Allow to sit at room temperature for about 10 minutes.
  15. Serve and enjoy!

Horseradish Mashed Potatoes

Ingredients

  • 4 large potatoes – approximate cost $2.00
  • 1/2 cup butter – approximate cost $1.00
  • 2 tablespoons spicy horseradish – approximate cost $0.30

Method

  1. Optional: Peel skin off of the potatoes  (I left the skins on).
  2. Bring a large pot of water to a boil.
  3. Slice potatoes into bite-sized pieces.
  4. Boil potatoes until they can be easily pierced with a fork (approximately 15 minutes).
  5. Drain water.
  6. Combine potatoes, horseradish, and butter.
  7. Mash until well-combined.

Makes about 16 servings (approximate cost: $1.73 per serving).

Wednesday Link Parties

Cast Party Wednesday

White Lights on Wednesdays

Fluster Buster

Sweet Green Juice

I made a kitchen purchase. And sold a few other items. And oh I’m so happy with the decision!

I said goodbye to a few items that I found I hadn’t been using. Goodbye pasta maker, ravioli maker, bread maker and waffle maker! It’s been good, but you were taking up a lot of space in my kitchen. Thank you Kijiji for helping me re-home these functioning but unused items (and helping to get a bit of cash towards the purchase of my new item).

Hello and welcome juicer!

I’ve gone a bit overboard with the juicing. I’m buying more fresh vegetables than ever before (which is great, except that they’re quite expensive in the winter months). I’ve had a fresh juice every morning and a few evenings since I made the purchase. A friend recommended that I go to the discount grocery store that is a bit further than the usual store at which I shop. That has helped very much in keeping the cost down.

So, I’m sorry in advance if I’m overloading you with juice recipes over the next month or more. But they’re so healthy and delicious! And already I’ve noticed that I’m getting more adventuresome in what I will try.

Today, I’m sharing a sweet-tasting green juice. The pear, apple, and grapes make it sweet and helps you ease in to drinking greens. If you have been wanting to try green juices, this is a great way to start out!

Sweet Green Juice

Ingredients

  • 1 small handful of parsley – approximate cost $0.30
  • 1 russet pear – approximate cost $0.30
  • 2 large handfuls of spinach – approximate cost $0.50
  • 1 Macintosh apple – approximate cost $0.30
  • 30 red grapes – approximate cost $0.60

I can’t guarantee that anything in my home is cat-hair free. I do my best, but she’s just so curious about everything!

Method

  1. Add the ingredients to the juicer one at a time, starting with the softest ingredients and moving to the most dense:
    1. Parsley
    2. Spinach
    3. Grapes
    4. Pear
    5. Apple
  2. Serve and enjoy!

Makes 1 serving (approximate cost: $2.00 per serving).

Wednesday Link Parties

Cast Party Wednesday

White Lights on Wednesdays

Fluster Buster

Bryan’s Mom’s Green Chile Chicken Enchilada Casserole

Woops! It’s been a little more than a month since I last posted. How time flies! We’ve been super busy around here. Most of my time has been occupied by studying for a big exam that’s coming up in December. I’m loving being a teaching assistant — I look forward every week to my two hour lecture.  I’m also taking a professionalization course and learning so many things about academia that I was unaware of before. And so much more! (I wouldn’t know what to do with myself if I had any free time!)

One of the recent highlights was a potluck with Bryan’s colleagues. I love potlucks because they’re a good time to showcase your best recipes. I also like when to see a large diversity of foods from other cultures. We had just the right recipe to fit the bill: Bryan’s Mom’s Green Chile Chicken Enchilada Casserole! It was perfect because I was able to find fresh Anaheim chile peppers at the grocery store that week, it’s difficult to find Mexican or Southwestern food here, it’s one of our favourite meals, and I was sure it was something that no one else would contribute to the potluck. (We also made Green Chile Pepper and Tomato Soup for ourselves while I was roasting all those chile peppers).

We had a fantastic evening full of good food and fantastic company! I hope we get an invitation to the next potluck despite that Bryan has now graduated.

I’m happy to report that the dish was well-received! We took one enchilada casserole with us to the potluck and kept one at home. Good thing I made extras, because there weren’t any leftovers to bring home.

Bryan’s Mom’s Green Chile Chicken Enchilada Casserole

Changes from the original recipe:

  • The original recipe calls fora package of frozen “Bueno Hot Autumn Roast green chile.”  These chiles aren’t available here and the closet thing I can get is fresh Anaheim peppers.
  • The original recipe calls for wrapping some cheese and chicken in each of the (large size) tortillas. I could only find the small corn tortillas and opted for the casserole style used in Bryan’s Step-Father’s Red Chile and Enchilada Casserole. Thus, all the cheese went into the sauce instead of reserving some to fill the tortillas.
  • The original recipe calls for a Mexican cheese blend. The blends that I found either have chili or jalapeño peppers in them, which I didn’t want because this dish is spicy enough as is… so I opted to make my own blend using Cheddar and Monterey Jack cheeses.
  • I doubled the quantities because we wanted lots of leftovers for lunch!

Green Chile and Cheese Sauce

Ingredients

  • 1/3 cup butter– approximate cost $0.50
  • 4 (slightly rounded) tablespoons flour– approximate cost $0.25
  • 1 teaspoon sea salt– approximate cost $0.05
  • 4 cups whole milk– approximate cost $3.00
  • 7 cups cheese (a blend of medium Cheddar and Monterrey Jack), shredded – approximate cost $9.00
  • 1 onion, chopping– approximate cost $0.75
  • 2.2 kilograms (4.85 pounds) fresh Anaheim (Green) chile peppers – approximate cost $20.00

Method

  1. Preheat your oven’s broiler.
  2. Roast the Anaheim chile peppers.
    1. Arrange the chiles in a roasting pan.
    2. Roast under the broiler for 5 minutes.
    3. Turn the chiles.
    4. Roast for an additional 5 minutes.
    5. Turn the chiles.
    6. Roast for an additional 5 minutes.
    7. Turn the chiles.
    8. Roast for an additional 5 minutes.
    9. Note: The chiles should be blackened on all sides at this point.
    10. Allow the chiles to cool.
  3. Peel the blackened skin off of the chiles.
  4. De-seed the chiles as necessary (more seeds = more heat).
  5. Chop the chiles into 1/4″ pieces and set aside.
  6. Heat butter in a large pot over medium heat until melted.
  7. Turn down the heat.
  8. Stir flour and sea salt into the butter.
  9. Stir constantly until the flour dissolves.
  10. Add milk.
  11. Stir until hot, but not boiling (the sauce should be quite thick)!
  12. Add cheese blend.
  13. Stir frequently until melted.
  14. Add the roasted chile pieces.
  15. Remove from heat.

Casserole

Ingredients

  • 1.2 kilograms (2.6 pounds) boneless, skinless chicken breasts – approximate cost $24.00
  • 48 small corn tortillas – approximate cost $1.80
  • Green chile and cheese sauce
  • Cooking oil– approximate cost $1.00

Method

  1. Preheat oven to 350 degrees Fahrenheit.
  2. Prepare the chicken.
    1. Bake the chicken breasts until cooked through (about 15 minutes)
    2. Allow the chicken to cool until you can handle it.
    3. Chop the chicken into small, approximately 1/4″ pieces.
    4. Set chicken aside.
  3. Prepare the corn tortillas.
    1. Heat 1/4″ oil in a frying pan.
    2. Very lightly fry the corn tortillas.
    3. Place on paper towels as they come our of the frying pan to remove some of the oil.
  4. Assemble the casserole!
    1. Distribute half the fried tortillas into an even layer in the bottom of 2 9×13 baking dishes (it’s ok if they overlap).
    2. Top with half of the chicken.
    3. Smother with 1/2 of the green chile and cheese sauce.
    4. Distribute the second half the fried tortillas into an even layer in the baking dishes.
    5. Top with remaining chicken.
    6. Cover with remaining green chile and cheese sauce.
      1. Note: Once assembled, you can refrigerate the casserole and bake it at another time.
  5. Bake about 30-45 minutes, or until the sauce begins to bubble.
  6. Remove from oven.
  7. Let stand on the counter for a few minutes.
  8. Serve and enjoy! (Optional: Serve with beans, rice, and flour tortillas)

Makes about 24 servings, or 2 9×13 casseroles (approximate cost: $2.51 per serving).

Wednesday Link Parties

Cast Party Wednesday

White Lights on Wednesdays

Fluster Buster

Bryan’s Mom’s Chocolate Cake

Miss me yesterday? Normally I post on Wednesdays and join a bunch of blog parties… but I decided to switch things up. Typically, today I would be be participating in the Improv Challenge hosted by Kristen from Frugal Antics of a Harried Homemaker. But… the challenge ingredients didn’t work well with our current dietary habits so I decided to skip out this month. You should stop by and check out the challenge though, there are, as usual, some delicious and fantastic recipes posted!

Today, I’d like to wish my wonderful, loving, best friend and boyfriend Bryan a very Happy Birthday!

Bryan — Thank you for being so wonderful! … and eating all my failed attempts at baking your favourite cake. Love you immensely!

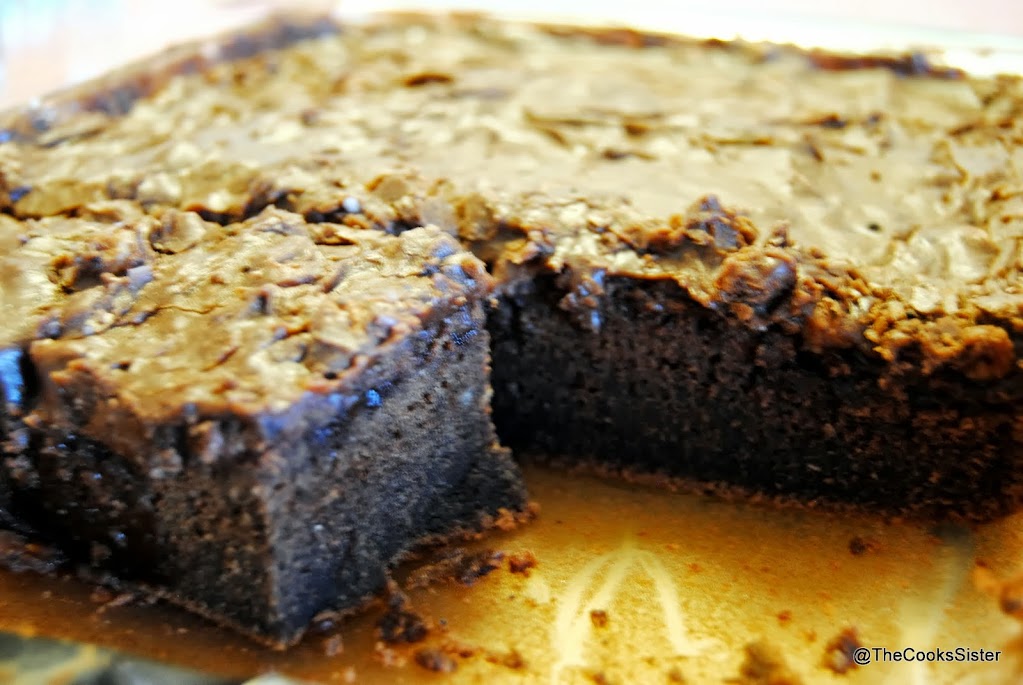
To celebrate his birthday I’ll be making yet another attempt at making his absolute all-time favourite cake (His mom’s recipe). The pictures come from my last, and most successful, attempt at making the cake so far. My brother and I served the cake at a birthday lunch we hosted for Nana back in August. The cake went over really well despite the fudgy texture.

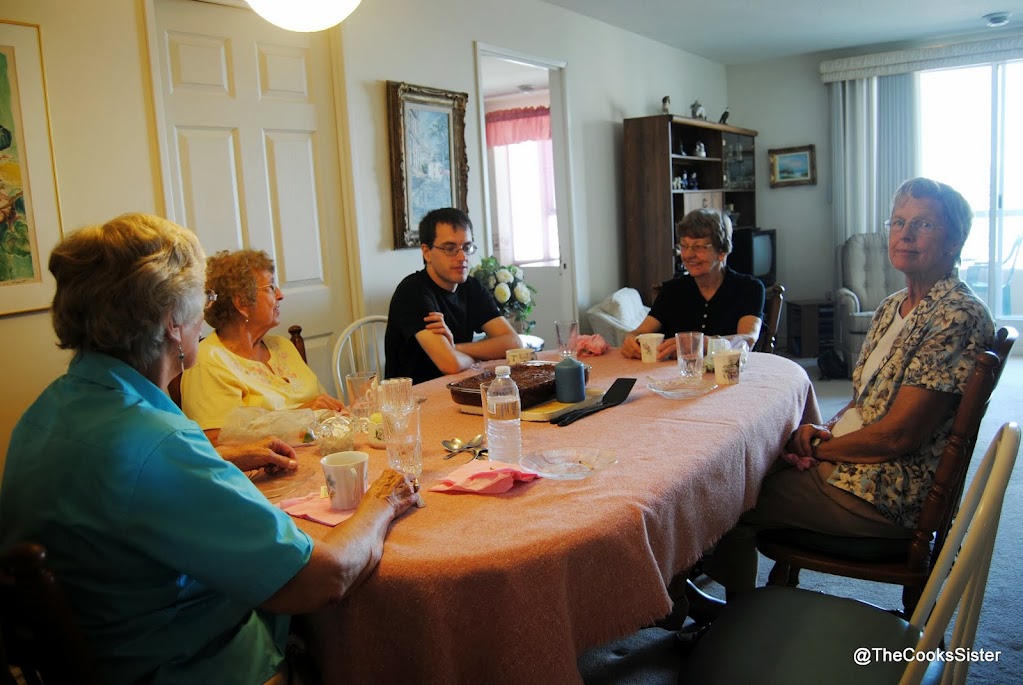
Nana, her sisters, and my brother Matt getting ready to enjoy their chocolate cake! (For Nana’s birthday gift, Matt and I hosted a lunch for these lovely ladies. They all loved it and had a wonderful afternoon!)

The recipe may look simple enough. But you see, I’m a terrible baker. It never seems to come out right.

At first, I tried to make the recipe, but changing some of the directions (I tried to melt/boil ingredients on the stove-top instead of in the microwave). I tried to fiddle with the ingredients (using only lard instead of adding some butter and vice versa). Less sugar maybe? Usually I get the cake right. It should be fluffy (not fudgy, which is what happened last time). The frosting is generally the tough part. It frequently comes out soupy (it should be thick). What I’ve learned… mother knows best when it comes to her own recipe! Stick to it.

What makes this cake so amazing? It’s chocolately (cake and frosting). It’s fluffy. It’s oh so sweet. And when Bryan’s mom makes it, it’s one of my absolute favourite desserts. But most important, this cake reminds me of Bryan’s wonderful and welcoming family and my trips to New Mexico.

Bryan’s Mom’s Chocolate Cake

Ingredients

Cake

  • 2 cups sugar  – approximate cost $0.75
  • 2 cups flour  – approximate cost $0.60
  • 1 teaspoon baking soda  – approximate cost $0.05
  • 1/2 cup butter or margarine  – approximate cost $0.50
  • 1/2 cup lard (Crisco)  – approximate cost $0.40
  • 4 tablespoons cocoa  – approximate cost $0.40
  • 1 cup water
  • 1/2 cup buttermilk (1/2 milk added to 1/2 tablespoon lemon juice)  – approximate cost $0.30
  • 1 teaspoon vanilla  – approximate cost $0.10
  • 2 eggs  – approximate cost $0.50

Frosting

  • 1/2 cup butter or margarine  – approximate cost $0.50
  • 6 tablespoons milk  – approximate cost $0.20
  • 4 tablespoons cocoa  – approximate cost $0.40
  • 1 pound or 454 grams icing sugar  – approximate cost $1.00
  • 1 teaspoon vanilla  – approximate cost $0.10
  • 1 cup chopped pecans  – approximate cost $2.00

Method

  1. Preheat oven to 350 degrees Fahrenheit.
  2. Prepare the cake batter.
    1. Stir together sugar, flour, and baking soda in a large mixing bowl.
    2. Bring butter (or margarine), lard, cocoa, and water to a boil. (NOTE: Bryan’s mom melts the ingredients in the microwave. She also notes that she uses margarine and butter-flavoured Crisco sticks. I melt the ingredients in a pot on the stove. I have used butter and a generic brand of lard)
    3. Stir butter mixture well.
    4. Slowly add the dry flour mixture to the butter mixture.
    5. Mix well using an electric mixer.
    6. Slowly add (while continuing to mix):
    7. Buttermilk (NOTE: Bryan’s mom notes that you can use milk added to one-half tablespoon of lemon juice as a substitute — I use this recommendation)
    8. Vanilla
    9. Eggs (NOTE: Bryan’s mom notes that she uses one-half cup of egg beaters)
    10. Bake in 11×13 oblong pan for 35-40 minutes at 350 degrees Fahrenheit.
  3. Prepare the frosting.
    1. Bring butter or margarine, milk, and cocoa to a boil in the microwave. (NOTE: For whatever reason, this direction is a must! I’ve tried melting these ingredients in a pot on the stove many times. Each attempt was unsuccessful, resulting in a liquidy frosting that never stuck to the cake. Use the microwave and the frosting will turn out thick every time.
    2. Mix well with electric mixer.
    3. Add icing sugar, vanilla and chopped pecans.
    4. Mix well with electric mixer.
  4. Pour icing over HOT cake.
  5. Serve and enjoy!

Makes 15 servings (approximate cost: $0.52 per serving).

Pan-Fried Perch

I’m back! I took a break for finals, some “me” time, and orientation week. I did a lot of writing the last month and needed a break in my personal time.

A lot happened during this time, but I think the highlight was the AcroYoga workshop that I attended. I attended my first beginners AcroYoga workshop back in January and have been attending the bi-weekly classes over the summer. I was super excited when I got the opportunity to attend an intermediate workshop! The focus of the workshop was Star Pose, and we learned a lot of poses that lead up to it, including: stag, candlestick, folded leaf, and a few others.

For me, the most exciting part of the workshop was right at the moment this photo was snapped! (Thanks for capturing the moment Leena!) There, in the green tank top, is my FIRST EVER ever handstand.

Acro-Yoga Hanstand! Photo Credit to Super-Amazing Yoga Instructor Leena Miller -Cressman (http://instagram.com/p/dOBTerMKgY)

Handstands, unassisted, still freak me out a bit a lot. However, I’ve made a point of practicing them with my AcroYoga friends. They’re becoming less intimidating, and I’m more confident. Having spotters around makes the idea of falling much less scary as well.

The weekend after the workshop, I visited my Nana for dinner. I made some pan-fried perch fillets. She made the side dishes: long grain rice and yellow beans (her favourite vegetable).

Pan-Fried Perch

Ingredients

  • 2 pounds perch fillets  – approximate cost $20.00
  • 1 1/2 cups flour  – approximate cost $0.40
  • 2 tablespoons paprika  – approximate cost $0.25
  • 1 tablespoon baking powder  – approximate cost $0.20
  • 1 tablespoon sea salt  – approximate cost $0.10
  • 1 teaspoon black pepper  – approximate cost $0.10
  • Oil for frying (I used canola oil)  – approximate cost $1.00

Method

  1. Combine flour, paprika, baking powder, sea salt, and pepper in a large freezer-sized zipper bag.
  2. Shake well to mix ingredients.
  3. Add 2-3 perch fillets to the flour mix.
  4. Seal and shake until fish is well-coated with the flour mixture.
  5. Set fish on a plate.
  6. Repeat steps 3-5 until all of the fish fillets are coated with the flour mixture.
  7. Preheat a frying pan adding about 1/4 inch oil in the bottom of the pan.
  8. Fry perch fillets — a few at a time so as not to overcrowd the pan — until golden.
  9. Flip and continue to fry until the other side turns a golden colour.
  10. Remove to a plate with paper towels (they will soak up any excess oil).
  11. Repeat steps 8-10 until all of the fish is cooked.
  12. Serve with your favourite side dishes and enjoy!

Makes 6 servings (approximate cost: $3.68 per serving).

Wednesday Link Parties

Cast Party Wednesday

White Lights on Wednesdays

Fluster Buster

Another Leibster Nomination and Berkshire Pork Chops with Roasted Garlic Asparagus

A big thank you this week to Kumu, who blogs over at A Tea Spoon of Love who nominated me for the Leibster Blog Award! I was actually nominated for the award earlier this month as well. I’m so honoured to have fellow bloggers recommend my blog! That said, I love the questions and how they give you a better idea of who I am. However, I don’t think I follow enough blogs (let alone ones that meet the criteria of the award) to nominate another 11 blogs/bloggers. I’ll give it my best shot though!

liebster-award

Here are the rules of the Leibster award as I understand them. The blog/blogger nominated for the award…

  • Answers 11 questions posed by the nominator. (In my case, Jon has given me 7)
  • Nominates 11 other blogs (with 200 or fewer followers)
  • Creates their own new set of questions for the nominees.

Responses

  1. Favorite vacation spot of all time?
    1. This is difficult to answer! I’ll give you my top three: New York City; West Palm Beach, Florida; and Santa Fe, New Mexico. Yes, these are all in the U.S. As a full-time student, I don’t get much time to travel for a vacation. I love all of these locations for visiting family and friends. NYC is very interesting for walking and sight-seeing. I love snorkeling at the coral reef beaches in West Palm. And the gorgeous mountains and hiking in Santa Fe. At some point, I hope to travel much more! On my list of places I’d like to see is Venice, Tokyo, Seoul, Bangkok, Paris, and many more!
  2. Favorite book and why?
    1. I assume this isn’t supposed to be the question that is overly difficult. Yet I find myself humming and hawing, changing my mind, second guessing my answer. Do I pick something I enjoyed reading? Something that I’ve ready that has been very useful afterwards? I decided to go with books I’ve enjoyed reading for the sake of reading. My favourite, momentarily, is probably Neil Gaiman’s Stardust. I love both the book and the movie. This is one of the few adaptations I’ve seen that dares to change the ending of the story. I saw the movie first and read the book just last summer. I couldn’t out it down and, despite having seen the movie, loved every moment reading the book. Other notable candidates, in no particular order, include:
      Sabriel by Garth Nix
      – The Harry Potter series by J.K. Rowling
      The Sailor Who Fell From Grace with the Sea by Yukio Mishima
      Pride and Prejudice by Jane Austen
      The Lord of the Rings by J.R.R. Tolkien
      The House of Mirth by Edith Wharton
      The Legends of Vancouver by Pauline Johnson
  3. Food tradition you love?
    1. Family dinner! I love when my large extended family gets together for a day of cooking, eating, and spending time together. I’m very fortunate that this tradition happens a few times per year!
  4. If you could go to dinner with any 5 famous people (dead or alive) – who?
    1. 10-year-old me is screaming THE SPICE GIRLS!!! I think I’ll go with that. 🙂
  5. Favorite cuisine?
    1. Not sure I could choose! Probably Guyanese food. Not only is it delicious, it has nostalgia. Growing up, my next-door neighbours (who were really more like my second family) would cook Guyanese food frequently and share it with my family. I remember loving most of it, except the really spicy wiri pepper hot sauce (that was so hot is once made me cry). When I visit them in New York, I eat them clean out of food, the spice doesn’t both me as much as an adult. I’ve even tried to replicate a few of the recipes at home.
  6. House is on fire – family made it out – what is the one thing you grab? (you can only grab one)
    1. I’m counting the cat as family that has got out safely. My camera bag. It has my camera, lens, and ALL of my photos in it. I tend to buy huge memory cards and keep them as back-ups.
  7. Favorite type of chocolate?
    1. Dark chocolate, hands down. My favourite is 80% cocoa with almonds.
  8. Favorite beverage?
    1. Moroccan Mint Tea with honey
  9. Movie you most relate to.
    1. I’m not sure I really relate to any movies. I can’t think of anything… but my all time favourite is Pirates of the Caribbean: The Curse of the Black Pearl.
  10. If you can trade places with a famous person for 24 hours, whom would you pick?
    1. I’m drawing a blank on this one. I’m quite happy not to be the center of attention, even if it just for a 24 hour period.
  11. A TV show you love to watch.
    1. We don’t have cable or Netflix. We mostly watch shows on DVD (ones that come highly recommended by friends) or are available on YouTube. We most recently watched and enjoyed Game of Thrones. I’ve also been sporadically watching episodes of The Dog Whisperer. I also like Firefly, Buffy the Vampire Slayer, Friends, The Big Bang Theory, How I Met Your Mother and probably many more that I cannot think of at the moment.

Nominees

In no particular order…

  1. Sophie’s Foodie Files
  2. MJ’s Kitchen
  3. Dominican Heat
  4. from the Bartolini kitchens
  5. Whip a Dish
  6. Love Bakes Good Cakes
  7. Doggie at the Dinner Table
  8. Lisa is Cooking

Questions for nominees:

  1. What 3 words would you choose to describe yourself?
  2. Do you have a blogging mentor who has made a huge difference along the way?
  3. Have you met any of your blogging friends in real life?
  4. What inspires you to continue writing your blog?
  5. What is your favourite family recipe?
  6. Which of your own blog posts are you most proud of?
  7. What is your favourite type of food?
  8. What is your favourite pastime?
  9. Where would you most like to go for your dream vacation and why?
  10. What is your favourite genre of music?
  11. If someone made a film about your life, who would you want to play you?

As if this post wasn’t long enough… I’d also like to share some recipes today!

Bryan asked me if there is a testimonials section for the blog… I asked him to leave a comment. Instead, he asked me to inform you in this post that: “This food-girl makes the best noms.” Thanks Bryan!

Berkshire Pork Chops with Smoked Paprika and Espelette Pepper

Ingredients

  • 2 bone-in Berkshire Pork Chops (about 3/4 pound each)  – approximate cost $10.50
  • 1 tablespoon grapeseed oil  – approximate cost $0.10
  • 1/2 teaspoon sea salt  – approximate cost $0.05
  • 1/4 teaspoon black pepper  – approximate cost $0.05
  • 1 teaspoon smoked paprika  – approximate cost $0.10
  • 1/2 teaspoon dried sage  – approximate cost $0.05
  • 1/2 teaspoon espellette pepper  – approximate cost $0.10

Method

  1. Heat grapeseed oil in a frying pan over medium heat.
  2. Add pork chops (you should hear them sizzle when added to the frying pan).
  3. Cook for 4 1/2 minutes.
  4. Turn.
  5. Sprinkle with sea salt, black pepper, smoked paprika, died sage, and espellette pepper.
  6. Cook for an additional 4 1/2 minutes.
  7. Test for desired doneness and cook more if necessary.
  8. Remove from frying pan and let stand for 3-4 minutes.
  9. Pour half of the glaze over each of the pork chops.
  10. Serve and enjoy!

Roasted Garlic Asparagus

Ingredients

  • 1 1/2 pounds asparagus – approximate cost $4.50
  • 1 teaspoon sea salt  – approximate cost $0.05
  • 2 tablespoons olive oil  – approximate cost $0.15
  • 2 cloves garlic, minced  – approximate cost $0.30

Method

  1. Turn the oven to broil.
  2. Place the asparagus in a large roasting pan.
  3. Sprinkle with salt.
  4. Drizzle with olive oil and garlic.
  5. Broil until the asparagus turns bright green.
  6. Flip the asparagus.
  7. Broil until the other side is bright green and the tips begin to brown.
  8. Remove from oven.
  9. Serve with pork chops and enjoy!

Note: These dishes take about the same amount of time to cook. I started the asparagus first then cooked the pork chops.

Makes 2 servings (approximate cost: $7.98 per serving).

Wednesday Link Parties

Cast Party Wednesday

White Lights on Wednesdays

Fluster Buster

Trout with Caper and Butter Sauce and Roasted Balsamic Asparagus

Did you hear about the big storm that hit KW last Friday? I’ve never seen anything like it. The wind and rain was intense. The thunder and lightning actually worried me less than the former. It seems almost everyone in the city has their own story to share… and we’ve been sharing stories all week!

I was at Vincenzo’s, a local grocery store, when the storm hit. The winds were so strong that we could see and hear them shaking. My little brother was on a bus at the time. The bus had to pull over due to poor driving conditions. A tree was struck by lightning nearby and fell onto a hydro pole, which then fell on the bus! I’m happy to say that my brother and everyone else on the bus is ok. We exchanged text messages and a few photos — he was bored being stuck on the bust for almost an hour afterwards!

Trees and branches are still being cleared even today! Check out some images of the damage the storm caused:

I’m also happy to tell you that my garden made it through the storm! No planters were knocked over or damaged. My neighbourhood seems to have missed the worst of the storm.

I started my garden quite late this year. I didn’t plant anything until mid-June. I have two lovely tomato plants, a basil plant, chives, and mint. The tomatoes are from my aunt at Sun Root Organics (if you’re in Ontario, check out her blog and Facebook page). Despite planting the tomatoes later than I’d have liked, they’ve really taken off and are growing like crazy! I took the photos a few days ago, and the tomatoes are more plentiful already! The basil is from a vendor at the St. Jacob’s Market, and the chives and mint came back from last year. I have been using the chives in my cooking recently and can’t wait for some fresh basil and tomatoes!

Since the storm, it has cooled down enough to cook again! Hooray! I’m quite enjoying being back in the kitchen. 🙂

Trout with Caper and Butter Sauce

Ingredients

  • 1 pound steelhead trout fillet – approximate cost $8.50
  • 1/4 teaspoon sea salt – approximate cost $0.05
  • 1/4 cup butter – approximate cost $0.50
  • 1 teaspoon grapeseed oil – approximate cost $0.05
  • 2 cloves garlic, minced – approximate cost $0.20
  • 1 100 mL jar capers – approximate cost $2.00

Method

  1. Preheat a frying pan over medium-low heat.
  2. Add butter and grapeseed oil.
  3. Heat until butter is melted.
  4. Add garlic.
  5. Cook until garlic is fragrant.
  6. Sprinkle salt over fish.
  7. Add fish (skin-side down if there is skin on the fillet).
  8. Cook until about 3/4 cooked.
  9. Turn the fish.
  10. Add capers.
  11. Cook until done.
  12. Remove from frying pan.
  13. Serve and enjoy!

Roasted Balsamic Asparagus

Ingredients

  • 1 1/2 pounds asparagus – approximate cost $4.50
  • 1 teaspoon sea salt – approximate cost $0.10
  • 2 tablespoons olive oil – approximate cost $0.10
  • 3 tablespoons balsamic vinegar – approximate cost $0.50

Method

  1. Turn the oven to broil.
  2. Place the asparagus in a large roasting pan.
  3. Sprinkle with salt.
  4. Drizzle with olive oil and balsamic vinegar.
  5. Broil until the asparagus turns bright green.
  6. Flip the asparagus.
  7. Broil until the other side is bright green and the tips begin to brown.
  8. Remove from oven.
  9. Serve with trout and enjoy!

Note: These dishes take about the same amount of time to cook. I started the asparagus first then cooked the fish.

Makes 2 servings (approximate cost: $8.25 per serving).

Wednesday Link Parties

Cast Party Wednesday

White Lights on Wednesdays

Fluster Buster

Improv Challenge: Peaches and Herbs (Pork Chops with a Peach and Sage Glaze)

I’m excited to once again be participating in the Improv Challenge hosted by Kristen from Frugal Antics of a Harried Homemaker! This month, the challenge ingredients are peaches and herbs.

Due to the heat wave, I’m keeping today’s post shorter than usual. It’s hot in my apartment. So hot, that I’d rather be outside! Loki is spending most of her time in the bathtub or in front of the fan to keep cool. I’ve gotten to know my neighbours better this week because many of us are sitting in the shady backyard.

I made the dish for the Improv Challenge, lucky for me, just before the heat wave hit. The dish came about by chance. There were some pork chops at the butcher shop that I just *had* to try. It’s from pasture raised Tamworth x English Black pork. Let me say, this pork was worth the hefty price tag… but definitely something we will have only as a treat. I really like to cook pork chops with sage. And peaches go well with pork.

The result? Bryan loved this dish just the way it was. I thought the peach flavour hadn’t infused the glaze enough. Next time I make the glaze, I will blend it before serving over the chops then add a few extra peach pieces for presentation.

I served this with a tomato, avocado and cucumber salad.

Pork Chops with a Peach and Sage Glaze

Ingredients

Pork Chops

  • 2 bone-in Tamworth x English Black pork chops (1 3/4 pounds) – approximate cost $22.00
  • 2 teaspoons grapeseed oil – approximate cost $0.20

Glaze

  • 1 cup frozen peaches – approximate cost $1.00
  • 1 cup water
  • 5 fresh sage leaves, torn into small pieces – approximate cost $0.50
  • 1 teaspoon cornstarch (+ enough cold water to make a paste) – approximate cost $0.05
  • 1/2 teaspoon sea salt – approximate cost $0.05

Method

  1. Prepare the glaze.
    1. Combine peaches, water, and sea salt in a sauce pot.
    2. Cook over medium heat until peaches are unfrozen and heated through.
    3. Add corn starch and cook until thickened.
    4. Remove from heat.
    5. Stir in sage pieces.
    6. Cover and set aside.
  2. Prepare the pork chops.
    1. Heat grapeseed oil in a frying pan over medium heat.
    2. Add pork chops (you should hear them sizzle when added to the frying pan).
    3. Cook for 4 1/2 minutes.
    4. Turn.
    5. Cook for an additional 4 1/2 minutes.
    6. Test for desired doneness and cook more if necessary.
    7. Remove fry frying pan and let stand for 3-4 minutes.
  3. Pour half of the glaze over each of the pork chops.
  4. Serve and enjoy!

Makes 2 very large servings (approximate cost: $11.90 per serving).


My previous Improv Challenge contributions include:

Please check out the other Improv Challenge recipes!

Guest Post: Mediterranean Summer Salad With Extra Virgin Olive Oil

I love purchasing fresh local produce this time of year. Sometimes, the produce doesn’t even make it to the dinner table because I’ve eaten all of it as a snack! This happens every time I buy peas in the pod. I eat them all. Usually by myself. The cat will beg for them — my cat is strange, she loves to eat fresh green vegetables — and I’ll do my best to ignore her. Bryan usually comes home only to find a pile of empty shells… I tend to forget to save some for him as well.

I was quite excited, then, when Randi proposed the guest post I’m sharing with you today. Why? Because I love a delicious fresh salad and this one looks hearty enough to be a meal itself! And because tomorrow is Farmer’s Market day and I’m going to pick up some fresh produce to make this salad for lunch. Take it away Randi!


Author Bio: This is a guest post by Randi Leeds on behalf of Flavor Your Life. To get ideas on how to use olive oil please visit www.flavor-your-life.com.

A vibrant new campaign in support of Extra Virgin Olive Oil, “Flavor Your Life,” has launched in North America. It is jointly funded by the European Union, the Italian Department of Agriculture and Unaprol; the largest consortium of Olive growers in Italy. The goal of the campaign is to educate North American consumers and retailers on the importance of product origin and the quality level of the oil they use daily.

With all the recent controversy over the question “What IS EVOO,” this campaign aims to educate the North American consumer on the proper way to choose an extraordinary and tasty EVOO – from traceability to the origin of the product your purchasing.

There’s no better way to start summer off than with this tasty Mediterranean Salad, brought to you by the dynamic new campaign for Extra Virgin Olive Oil, “Flavor Your Life”.

Mediterranean Summer Salad With Extra Virgin Olive Oil

EVOO Mediterranean Salad

Ingredients

  • 2 pieces of Buffalo Mozzarella cheese, sliced
  • 4 large tomatoes sliced
  • 3 English cucumbers sliced
  • 1 tsp. capers
  • 1 tsp. lemon juice
  • Dash of salt & pepper
  • Fresh basil leaves for garnish
  • 4 Tbsp. Extra Virgin Olive Oil

Preparation

  1. Wash and cut all the vegetables.
  2. Place the green vegetables on a chilled plate.
  3. Add the mozzarella and cover with the sliced tomatoes.
  4. Sprinkle with capers and basil.
  5. Season with lemon juice, salt, and a pinch of pepper.
  6. Spoon Extra Virgin Olive Oil over dish.

To get ideas on how to use olive oil please visit www.flavor-your-life.com and follow us on Twitter and Facebook too.